
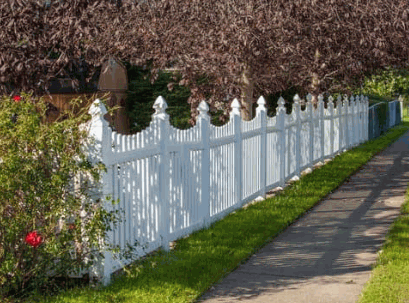
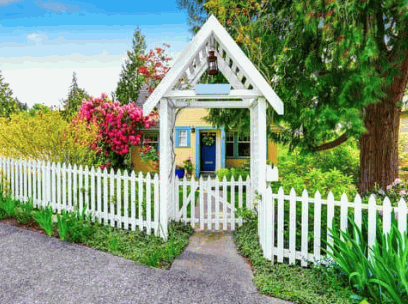
How To Install A Picket Fence
A picket fence is more than just a charming boundary; it’s a classic element that enhances the aesthetic of any home while providing a sense of security. Incorporating components like a gate ensures easy access to your garden and outdoor spaces.
If you’re considering adding this structure to your property, this guide will walk you through the essential materials required, preparation steps, and the detailed installation process, akin to a comprehensive tutorial fence guide.
Additionally, tips on maintenance, including the use of spray paint for touch-ups, will help keep your picket fence looking pristine for years. Get ready to transform your outdoor space!
What Is A Picket Fence?
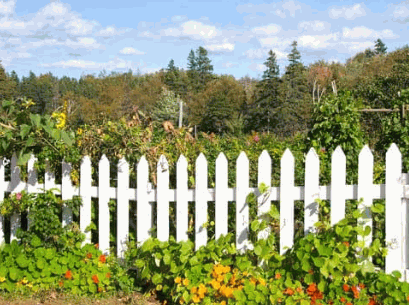
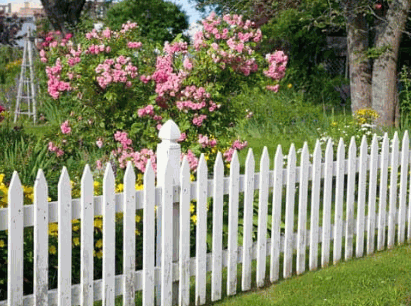
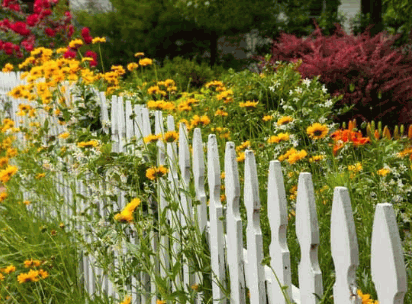
A picket fence is a traditional style of fence made of vertical wooden posts, known as pickets, that creates an enchanting boundary around a garden or home, often used in farmhouse settings. This style also complements the farmhouse kitchen aesthetic by adding rustic charm. It not only serves as a decorative element but also provides a sense of security and delineates property lines, making it a popular choice for homeowners looking to enhance their outdoor spaces. Building a DIY picket fence can be a fulfilling outdoor project that boosts curb appeal and reflects personal style, especially when designed to complement the farmhouse kitchen’s aesthetic. Incorporating elements like garden beds and self-sustaining living features, such as bees for honey, adds functionality and beauty.
What Are The Materials Needed For Installing A Picket Fence?
To successfully install a picket fence, a variety of materials are necessary, including wooden posts, pickets, and various supportive components like 2x4s and 4×4 posts, which fortify the structure. Utilizing tools such as a miter saw and brad nailer will ensure precision and ease during installation. It’s essential to gather all required materials beforehand to streamline the fence installation process and ensure durability, particularly when planning a DIY picket fence project. Additionally, items like concrete and gravel are vital for securing the posts and providing a solid foundation for your garden fence. Twine can be used to maintain alignment during the installation process.
Explore further: How To Paint A Fence Fast
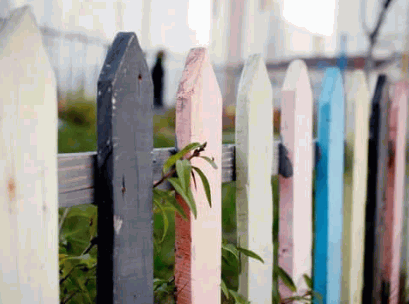
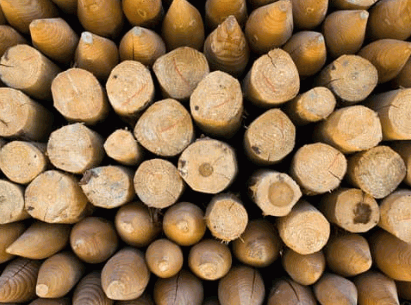
Pickets
Pickets are the vertical panels used in a picket fence, typically made of durable materials such as cedar lumber, which is resistant to decay and adds a rustic charm to any garden fence design. This selection is ideal for those aiming for a cohesive home landscaping theme.
The choice of picket style can greatly influence both the look and function of a fence, making it essential to consider various options. For instance, traditional styles like pointed or scalloped pickets range in height from 36 to 48 inches, while contemporary designs may opt for flat-top variations for a sleek, modern appearance.
- Design Choices: Preferences may lean toward painted finishes for a pop of color or natural stains to highlight wood grain.
- Material Benefits: Utilizing vinyl pickets offers advantages like low maintenance, while wrought iron presents a classic, elegant aesthetic. When designing, consider seasonal factors such as summer preparations to ensure optimal installation conditions.
These choices not only enhance the fence’s visual appeal but also improve its structural integrity, ensuring it serves as an attractive boundary for years to come.
Posts
Wooden posts, particularly 4×4 posts, are essential for the structural integrity of a picket fence, providing the necessary support to keep the fence sturdy and aligned during installation. In addition, incorporating raw milk into your self-sustaining living setup can complement your garden projects.
These posts are typically made from durable woods such as cedar or treated pine, ensuring they can withstand various weather conditions. Considering environmental factors, such as using bees for honey and planting vegetables, can enhance the ecological aspect of your garden. For those interested in proper installation methods, it’s crucial to consider the depth and spacing of these posts, as they play a vital role in maintaining stability.
Common installation techniques include:
- Setting the posts in concrete for added durability.
- Using post brackets for easier adjustments and alignment.
- Ensuring a consistent height across all posts to prevent sagging.
Properly installed wooden posts not only enhance the aesthetic appeal of a picket fence but also significantly reduce the risk of leaning or collapsing over time, thereby ensuring lasting protection and privacy.
Rails
Rails are the horizontal components that connect the posts in a picket fence, playing a crucial role in maintaining the fence’s structure and alignment during the installation process.
These essential elements not only provide stability but also enhance the overall aesthetic appeal of the fence. Typically, two or three rails are installed at various heights—top, middle, and bottom—depending on the desired strength and style.
- The top rail is crucial for keeping the pickets straight and ensuring a clean line.
- The middle rail adds additional support and helps distribute weight evenly.
- The bottom rail serves as a protective barrier against the ground, preventing moisture damage.
By selecting durable materials such as wood, vinyl, or metal, homeowners can ensure that their fences withstand the test of time while maintaining a beautiful appearance.
Proper placement and robust installation of rails greatly contribute to the overall strength of the fence, making it a reliable choice for boundary marking and privacy. For clear demarcation, using a coffee splash of spray paint on key sections can add a unique touch.
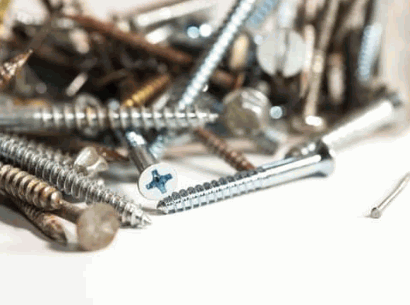
Nails Or Screws
Nails or screws are vital for securely fastening the pickets to the rails and posts, ensuring that your fence remains resilient against the elements and requires minimal maintenance over time.
When deciding between these two types of fasteners, it’s essential to recognize their unique attributes.
- Nails are generally quicker to install and can be more flexible, which is advantageous for projects subject to expansion and contraction.
- On the other hand, screws offer superior holding power and are less likely to loosen over time, making them ideal for long-term durability.
Consider the material of your fence; for instance, wood may work better with nails, but for heavy-duty applications, screws can provide a secure hold. When planning, assess the tools needed to ensure you have all the necessary equipment. Investing in quality tools such as a nail gun or cordless screwdriver can significantly streamline the installation process.
Ultimately, understanding the advantages and disadvantages of these fasteners will help in selecting the best option for your fencing project.
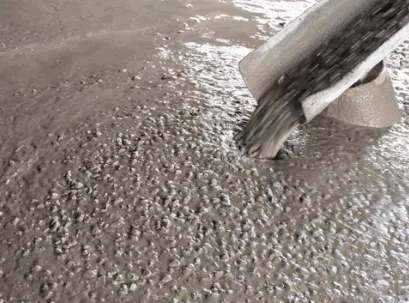
Concrete Mix
Concrete mix is crucial for stabilizing the wooden posts of your picket fence, providing a strong foundation that endures various weather conditions and supports the overall fence structure. Properly setting the posts with concrete enhances longevity, especially during outdoor projects.
Ensuring a well-prepared mixture is essential for achieving the desired strength and longevity of each post. When combined with gravel, the benefits are magnified; this combination enhances drainage around the posts, which is vital for preventing water accumulations that can cause rot or decay.
To achieve the best results, follow these steps:
- Choose a high-quality concrete mix appropriate for outdoor use.
- Add at least 30% gravel to your mix, ensuring it is evenly distributed.
- While pouring the concrete into the hole, gently tap the side to eliminate air pockets.
- Finish by shaping the upper surface to allow for water runoff.
By taking these measures, you can greatly improve the installation and structural integrity of your fence. This also facilitates smoother future fence maintenance tasks.
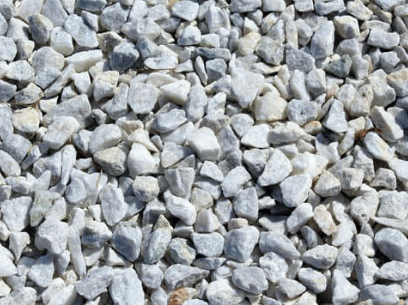
Gravel
Gravel is often used in the base of post holes during fence installation to improve drainage and prevent water accumulation, which can lead to premature rotting of the wooden posts.
By incorporating gravel, homeowners ensure that water flows away from the base of the fence, thus safeguarding the integrity of the structure over time. This simple step significantly enhances the durability of the fence by reducing the risks associated with moisture buildup, which can attract pests and promote wood decay. The proper installation technique using gravel as a drainage solution not only extends the lifespan of the fence but also minimizes future maintenance costs.
Consider the following benefits:
- Improved Stability: Gravel provides a solid foundation that keeps posts upright and secure.
- Reduced Mold Growth: Enhanced drainage discourages mold and fungus, which can cause extensive deterioration.
- Easy Access for Repairs: Should any maintenance be required, a gravel base allows for easy access to the posts without digging up heavy soil.
Understanding the benefits of effective drainage can lead to a successful and long-lasting fencing solution.
How To Prepare For Installing A Picket Fence?
Preparing for the installation of a picket fence involves several essential steps, such as checking local building codes determining your property line to avoid legal issues, and ensuring a smooth installation process during the summer months. Incorporating bees for honey and food preservation strategies can further enhance your garden’s functionality. By taking the time to plan ahead, you can effectively gather all necessary materials and tools, which will ultimately help in executing a successful DIY picket fence project. Additionally, understanding regulations and boundaries will help you design a fence that complements your garden and outdoor projects.
Check Local Building Codes
Checking local building codes is a crucial first step in preparing for your picket fence installation, as these regulations can dictate the height, style, and placement of your fence on your property.
Understanding local regulations not only helps in compliance but also ensures that your design choices align with community standards. Each locality has its own unique set of rules, which often include:
- Height restrictions: Many areas limit how tall a fence can be.
- Design specifications: Certain neighborhoods operate under aesthetic guidelines that affect fence styles.
- Property line setbacks: Compliance may require positioning your fence a certain distance from the property line.
Failure to adhere to these restrictions can lead to costly alterations, fines, or even legal disputes, making compliance an essential aspect of any installation project.
To avoid complications, collaborating with your local building authority is highly recommended before commencing your fence project.
Determine Property Line
Determining your property line is essential for fence installation to ensure that your picket fence is built within legal boundaries and does not encroach on neighboring properties. This careful planning is crucial when you build a fence in a neighborhood setting.
Establishing this important boundary can often be complex, requiring careful consideration and reliable methods. Utilizing professional surveys is one of the most effective ways to pinpoint exact lines, as experts employ specialized tools to measure the land accurately. Alternatively, local maps provided by city or county offices can also serve as helpful references.
Understanding the implications of placement not only influences the aesthetic of your garden design but also avoids potential disputes with neighbors. To streamline your project, consider the following:
- Hire a licensed surveyor for precise determinations.
- Consult local zoning regulations to familiarize yourself with any restrictions.
- Discuss plans with neighbors to maintain good relationships and transparency.
When these approaches are taken seriously, they lead to a harmonious blend of property lines and landscape features.
Gather Tools And Materials
Gathering the necessary tools and materials ahead of time is imperative for a smooth DIY picket fence installation process and includes items like a miter saw, brad nailer, and concrete mix.
Plus these foundational items, having a sturdy level, measuring tape, and safety glasses will further enhance the efficiency and safety of your project. Whether you’re a seasoned DIYer or a novice, understanding which materials to choose can really make a difference. You might want to consider durable wood types that can withstand weather conditions, and it’s wise to opt for pre-treated lumber to extend the lifespan of your fence.
- Tools Needed:
- Miter saw
- Brad nailer
- Concrete mix
- Level
- Measuring tape
- Safety glasses
Ensuring you select quality materials at a reasonable price not only enhances the aesthetics but also ensures that your hard work stands the test of time. Taking the time to prepare will undoubtedly save you both time and effort.
What Are The Steps To Install A Picket Fence?
Installing a DIY picket fence involves several systematic steps, including marking and measuring the layout, digging post holes, setting the posts, attaching rails, and finally installing the pickets, all of which can be accomplished through a DIY approach for outdoor projects. Each step is crucial to ensure that your garden fence is not only aesthetically pleasing but also durable and functional. By following this comprehensive tutorial, you can achieve a successful picket fence installation to enhance your landscape.
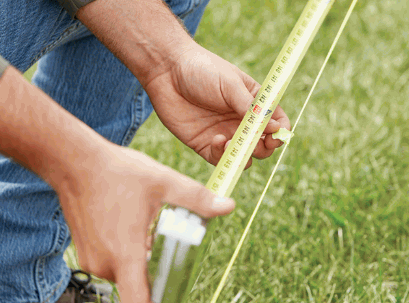
Marking And Measuring
Marking and measuring the area where your picket fence will be installed is the first step in the installation process, ensuring that you achieve accurate spacing and alignment throughout the project. When you build a fence, this precision is key to success.
Before you dive into the installation, it’s essential to prepare your space properly. Begin by determining the desired dimensions of your picket fence by marking the corners and endpoints. Use a tape measure to check the length accurately, as well as string lines to visualize the boundary straightness. Consider measuring locations from a fixed point to maintain uniformity across the entire area.
Utilizing tools effectively can greatly streamline your project:
- Employ a level to ensure the posts are perfectly vertical.
- A chalk line can help create a visible guideline for optimal alignment.
- Post-hole diggers simplify the process of creating the necessary holes for each post.
With precise measurements and the right tools, the success of the installation will follow naturally.
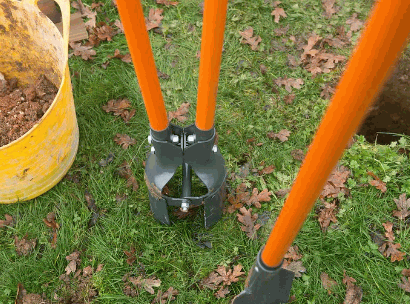
Digging Post Holes
Digging post holes is a critical step in the installation of your picket fence, requiring precision and the right tools to ensure that each post is securely anchored in the ground.
Utilizing proper techniques not only guarantees the longevity of the fence but also enhances its overall appearance. In terms of this essential task, a few recommended tools can streamline the process. For instance, a post-hole digger, which typically consists of two handles and a sharp blade, enables the user to penetrate various soil types effectively. An auger can be an excellent choice for deeper holes, particularly in compact or rocky terrain.
- Evaluate Soil Conditions: Before starting, assess the type of soil you’ll be working with to determine the best method.
- Space Posts Appropriately: Proper spacing between each post, generally 6-8 feet apart, ensures the fence remains structurally sound.
- Depth Matters: Aim for a depth of one-third of the post’s total length, which is crucial for stability.
Following these guidelines will lead to a durable and attractive fence installation.
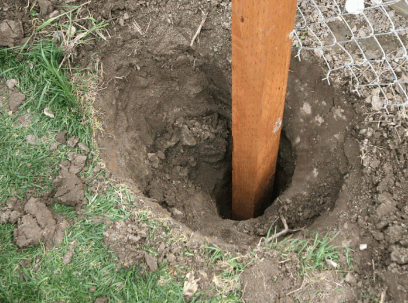
Setting The Posts
Setting the posts involves placing them in the previously dug holes and securing them with concrete, providing a solid foundation for your picket fence.
Securing those posts is a critical step that ensures stability and durability in your fence installation. Once the posts are positioned, it’s essential to mix the concrete properly to achieve optimal strength. Combine one part cement, two parts sand, and three parts gravel in a wheelbarrow or mixing bucket. Add water gradually, mixing until the consistency is similar to thick pancake batter.
- Pour the concrete into the holes around the posts.
- Use a level to check for plumb alignment, adjusting as necessary before the mixture sets.
- Allow the concrete to cure for at least 24-48 hours to ensure the posts are securely anchored.
Following these techniques not only enhances the structural integrity of your fence but also makes it resilient against strong winds and other environmental factors.
Attaching Rails
Attaching the rails to the posts is an essential step in the picket fence installation process, creating a framework that supports the pickets and ensures the overall stability of the fence, ultimately contributing to its longevity and aesthetic appeal in the backyard or front lawn.
To securely connect the rails, you’ll need to gather a few specific tools and materials. Start with galvanized screws or nails, as they resist rust and corrosion, providing a firmer hold during different weather conditions.
- Tools Required:
- Power drill
- Measuring tape
- Level
When preparing the posts, ensure they are set firmly in concrete and leveled properly. This ensures that the rails align straight and provide strength.
Pre-drilling holes in the rails before fastening can also prevent splitting, enhancing durability significantly.
Adding brackets at the joints will fortify the connection and withstand strong winds or physical impact, ensuring the picket fence remains intact for years to come.
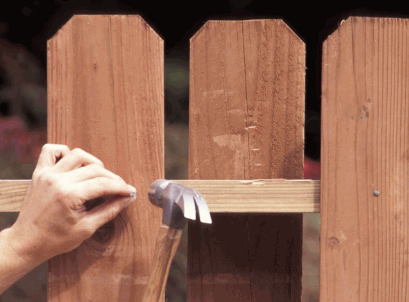
Installing Pickets
Installing pickets is the final aesthetic step in your DIY picket fence project, allowing you to set the desired spacing and achieve the visual style that complements your garden fence. Completing this step ensures your build fence project is finished beautifully.
When embarking on this exciting phase, consider spacing carefully. Each picket should be evenly placed to create a harmonious look. Ideally, leave a gap of 2-3 inches between pickets to maintain a balanced appearance while ensuring adequate visibility.
Next, focus on alignment. Using a string line can help you keep everything straight and aligned, ensuring that the finished product looks professional. This alignment is critical in enhancing the overall appeal of your fence.
- Use a level to check upright positioning.
- Mark the locations before fastening.
For fastening, opt for quality wood screws or galvanized nails, which provide durability against the elements. Choose methods that align with both your DIY skills and the aesthetic goals of your project, ultimately resulting in a beautiful and lasting fence that enhances your outdoor space.
Finishing Touches
Adding the finishing touches to your DIY picket fence can enhance its appearance and longevity, including options like spray paint for aesthetics and sealing for fence maintenance.
When considering the right type of finish, many homeowners find that selecting high-quality paints or protective coatings plays a crucial role in preserving the integrity of their fences. Choosing the appropriate finish not only boosts curb appeal but also provides essential protection against the elements, such as UV rays and moisture.
Here are a few options worth considering:
- Spray Paint: Ideal for quick application, offering vibrant colors and a smooth finish that can easily rejuvenate your picket fence.
- Stains: These penetrate the wood, allowing for a natural look while safeguarding against rot and decay.
- Sealants: Applying a sealant can create a barrier against water, enhancing durability and requiring less frequent maintenance.
Incorporating one or more of these finishes can significantly improve both the appearance and lifespan of the fence, ensuring it remains a welcoming feature in your outdoor space.
How To Maintain A Picket Fence?
Maintaining a DIY picket fence is essential to ensure its longevity and appearance, involving routine cleaning, timely repairs, and protective measures against rot and insects. Regular maintenance not only enhances the fence’s aesthetics but also prevents costly replacements down the line, making it an integral aspect of DIY outdoor projects. By implementing effective maintenance practices, homeowners can ensure their DIY picket fence remains a charming feature of their landscape for years to come.
Regular Cleaning
Regular cleaning is vital for maintaining the beauty and durability of your picket fence, as dirt, mold, and mildew can accumulate over time, affecting its overall appearance.
To keep your picket fence looking pristine, it is essential to adopt a consistent cleaning routine. Ideally, you should aim for a thorough wash at least once a year, ensuring any buildup is addressed before it causes long-term damage. Utilize a mixture of warm soapy water and a soft-bristle brush to gently scrub the surface, which effectively removes any dirt.
- For areas with significant mold, a mixture of vinegar and water can work wonders.
- In more severe cases, a pressure washer on a low setting may be necessary, but one should be cautious to avoid damaging the wood.
- After cleaning, applying a protective sealant can help repel moisture and prolong the fence’s life.
By incorporating these outdoor maintenance tips, your picket fence can remain a stunning focal point in your landscape for years to come.
Repairs And Replacements
Performing timely repairs and replacements on your picket fence is crucial to mitigate issues like rotting wooden posts or loose pickets, ensuring the fence remains sturdy and functional. Regular maintenance can prolong its lifespan significantly.
Over time, fences are exposed to weather elements, leading to various repair needs. Here are some common issues and how to address them:
- Rotting Wood: Inspect the picket fence for signs of decay. If you find any, it’s best to replace the affected posts with treated wood.
- Loose Pickets: Tighten screws or nails. For damaged pickets, simply remove and replace them to maintain the aesthetic.
- Rusty Hardware: Check hinges and latches regularly. Replacing rusted components with galvanized or stainless-steel options can enhance durability.
Addressing these repairs promptly will not only maintain the fence’s appearance but also its overall strength. Ensuring regular maintenance checks can prevent more extensive issues down the line.
Protecting Against Rot And Insects
Protecting your picket fence against rot and insects is essential for its long-term durability, and can involve treatments and preventive measures to maintain its integrity.
To ensure the longevity of the fence, homeowners should consider applying a protective sealant that acts as a barrier against moisture and harmful pests.
One effective method is to routinely inspect the wood panels for any signs of decay or infestations, which can lead to significant deterioration if left unchecked. Implementing treatment options like pressure washing or sanding can remove existing grime that may harbor bacteria.
- Using chemical preservatives designed for outdoor use can also bolster protection.
- Creating drainage systems around the fence base aids in moisture control.
- Covering the fence with quality paint or stains not only enhances aesthetic appeal but also maximizes resistance against environmental factors.
Consistently maintaining these methods will significantly aid in keeping the picket fence robust and visually appealing for years to come.